There could be several reasons why your Keurig coffee pot is leaking when you pour. One possible cause is a damaged or worn out seal on the lid or the bottom of the reservoir. Another reason could be a clogged or dirty needle that punctures the K-cup, causing the coffee to overflow. Additionally, overfilling the reservoir or using non-Keurig branded K-cups can also lead to leakage.
To fix the issue, try cleaning the needle and reservoir, checking the seals for damage, and ensuring that you are using the correct amount of water and K-cups. If the problem persists, it may be time to replace your Keurig coffee pot.
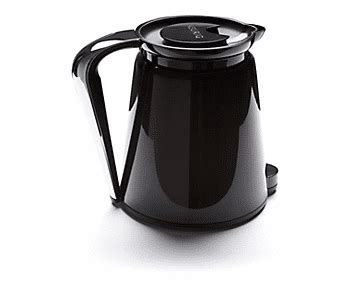
Why does my coffee carafe leak when I pour coffee?
The cause of the dribbling in coffee pots is due to capillary action, where the coffee sticks to the pot. However, this issue can be easily resolved by breaking the bond between the coffee and the pot.
Why does my Keurig leak when pouring?
One of the most common reasons for a coffee maker to leak is overfilling the water reservoir. This is especially true for smaller machines like the K-15 Mini. Another possible cause is a clogged machine, which can be fixed with a thorough cleaning. A loose or broken upper gasket can also lead to leaks.
It’s important to identify the cause of the leak in order to properly address the issue and prevent further damage to the machine.
How do you fix a leaking Keurig carafe?
To prevent coffee from leaking while pouring, there are two simple modifications you can make. First, file down the line located on the spout using a nail file. Second, remove the plastic piece on the handle side of the pot by using a wide pair of pliers to snap it off. This thin piece is often the culprit for preventing the lid from sitting down properly and securely.
By making these adjustments, you can enjoy a leak-free coffee pouring experience.

How do I change the O-ring on my Keurig?
To change the O-ring on your Keurig, first, unplug the machine and remove the water reservoir. Then, locate the O-ring on the bottom of the reservoir and gently remove it using a small tool or your fingers. Clean the area around the O-ring thoroughly and replace it with a new one, making sure it is properly seated. Finally, reattach the water reservoir and plug in the machine.
It is important to change the O-ring regularly to prevent leaks and ensure the longevity of your Keurig.
How do I clean the exit needle on my Keurig?
To clean the exit needle on your Keurig, first unplug the machine and remove the water reservoir and K-cup holder. Locate the exit needle, which is a small metal tube that punctures the K-cup during brewing. Use a paperclip or a needle to carefully remove any debris or coffee grounds that may be clogging the needle. You can also use a toothbrush or a soft-bristled brush to clean the needle and surrounding area.
Once you have removed all debris, reassemble the machine and run a few cycles of water through it to ensure that the needle is completely clean. It is recommended to clean the exit needle every few months to maintain the quality of your coffee and the longevity of your Keurig machine.
How do I clean my Keurig check valve?
To clean your Keurig check valve, first unplug the machine and remove the water reservoir. Then, locate the check valve at the bottom of the reservoir and use a paper clip or toothpick to gently clean any debris or buildup. You can also soak the valve in a mixture of water and vinegar for about 30 minutes before rinsing it thoroughly. Regular cleaning of the check valve can help ensure proper water flow and prevent clogs in your Keurig machine.
Is it OK to use vinegar to descale a Keurig?
If you don’t have the Keurig descaling solution readily available, don’t worry! White vinegar is a great alternative cleaning solution that you can easily have on hand. To use it, simply mix equal parts water and vinegar. Then, fill the reservoir about halfway with white vinegar and top it off with water until it reaches the top. This simple solution can effectively clean your Keurig and keep it running smoothly.
How long do Keurigs last?
“`The lifespan of a Keurig can vary depending on usage and maintenance. While some users have reported their Keurig lasting up to ten years, others have experienced a shorter lifespan of around three years. On average, you can expect your Keurig to last between three to five years before it begins to show signs of wear and tear. Proper cleaning and descaling can help prolong the life of your Keurig, so be sure to follow the manufacturer’s recommendations for maintenance.
“`
What happens if you don’t descale your Keurig?
Triple-delimited paragraph:
“`Regular descaling of your Keurig is essential to ensure its proper functioning. Neglecting this maintenance task can lead to disrupted water flow, resulting in longer brewing times and louder machine sounds. Additionally, it can affect the taste and temperature of your coffee, making it less enjoyable.“`
How many times do you have to run vinegar through Keurig to descale?
If you want to keep your coffee maker in top condition, it’s important to clean it regularly. One effective way to do this is by using a mixture of vinegar and water to remove any build-up. After letting the solution sit for a bit, run the machine for three to five cycles to ensure that all the gunk is removed. Finally, run a cycle of just water to rinse out any remaining residue.
By following these simple steps, you can ensure that your coffee maker stays clean and functions properly for years to come.
How many times should I run water through my Keurig after descaling?
To clean your coffee maker, start by pouring the contents of the mug into the sink. Then, using the largest brew size, run at least 12 rinsing brews. It’s possible that you may need to refill the water reservoir during this process. By following these steps, you can ensure that your coffee maker is thoroughly cleaned and ready to use again.
How long do you leave vinegar in a Keurig to descale?
To clean your Keurig, start by brewing a cup of hot water mixed with vinegar. Once it’s done, pour the vinegar mixture down the sink and repeat the process until the Add Water light turns on. Let the Keurig sit for an hour while still turned on. After an hour, dispose of any remaining vinegar in the reservoir and rinse it thoroughly.
This will ensure that your Keurig is clean and ready to brew your next cup of coffee.
What buttons do you press to descale a Keurig?
To descale a Keurig, you need to press a few buttons in a specific order. First, turn off the machine and unplug it. Then, remove the water reservoir and empty any remaining water. Mix a descaling solution with water and pour it into the reservoir.
Place the reservoir back onto the machine and turn it on. Press the “brew” button and let the solution run through the machine. Once the solution has run through, empty the reservoir and fill it with clean water. Run the clean water through the machine by pressing the “brew” button again.
Repeat this process until the water runs clear. Finally, remove the reservoir and let the machine dry completely before using it again.
How do I reset my Keurig after descaling?
To reset your Keurig after descaling, first, turn off the machine and unplug it. Then, remove the water reservoir and empty any remaining water. Next, replace the reservoir and plug in the machine. Press and hold the brew button until all the lights turn on, then release the button.
Finally, run a cleansing brew cycle with fresh water to ensure all descaling solution is removed. This process will reset your Keurig and ensure it is ready for use. It is important to descale your Keurig regularly to maintain its performance and prolong its lifespan.
Can I use apple cider vinegar to descale my Keurig?
Yes, it is possible to use apple cider vinegar as a cleaning agent for your Keurig. Simply mix equal parts of water and apple cider vinegar, as mentioned earlier, and run it through your machine as you would with regular coffee grounds. This method is effective in removing any buildup or residue that may be present in your Keurig, ensuring that your machine is clean and functioning optimally. Additionally, using apple cider vinegar as a cleaning agent is a natural and cost-effective alternative to harsh chemical cleaners.
Where does the little rubber piece go on the Keurig?
To put it simply, the small silicone or rubber piece is designed to fit onto the needle head where the coffee pod is placed. Its purpose is to act as a cushion, securing the pod in place and preventing any coffee grounds from escaping. To use it, slide the piece onto the needle head with the larger end facing downwards. This will ensure that your coffee pod stays in place and your coffee is brewed perfectly every time.
Why is my Keurig not piercing the bottom of the pod?
“`Ensuring that the needle is clean and unclogged is crucial for proper pod piercing. In case you notice any dirt or clogs, you can easily clean the needle using rubbing alcohol and a cotton swab. However, it’s essential to let the machine dry entirely before using it again to avoid any potential damage.“`
Why is my Keurig Mini leaking from the bottom?
If you notice water leaking from the bottom of your coffee machine, it’s possible that the K-cup holder is cracked. This can cause water to seep through and create a mess. To fix this issue, start by inspecting the K-cup holder for any visible cracks. If you find any, you’ll need to replace the holder using a helpful guide.
By doing so, you can prevent further leaks and ensure that your coffee machine is working properly.
How do you take apart a Keurig?
As an AI language model, I am not capable of physically taking apart a Keurig machine. However, if you are looking to disassemble your Keurig for cleaning or repair purposes, it is important to first unplug the machine and remove any remaining water from the reservoir. Then, remove the drip tray and K-cup holder. Next, use a screwdriver to remove any screws holding the top and bottom of the machine together.
Carefully separate the two halves and remove any internal components as needed. It is important to refer to the manufacturer’s instructions or seek professional assistance if you are unsure about disassembling your Keurig.
Related Article
- Why Does My Ingrown Toenail Keep Coming Back After Surgery?
- Why Does My Husband Answer A Question With A Question?
- Why Does My Hoverboard Turn Off When I Ride It?
- Why Does My House Shake When The Ac Is On?
- Why Does My Horse Put His Head Down When Riding?
- Why Does My Honda Pilot Beep When I Walk Away?
- Why Does My Heater Stink When I Turn It On?
- Why Does My Heat Pump Smell Like It’S Burning?
- Why Does My Hair Puff Up When I Brush It?
- Why Does My Hair Itch When I Wear A Hat?